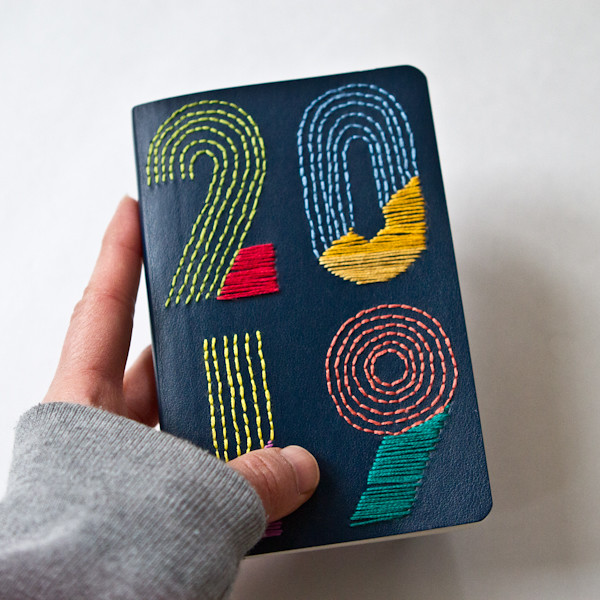
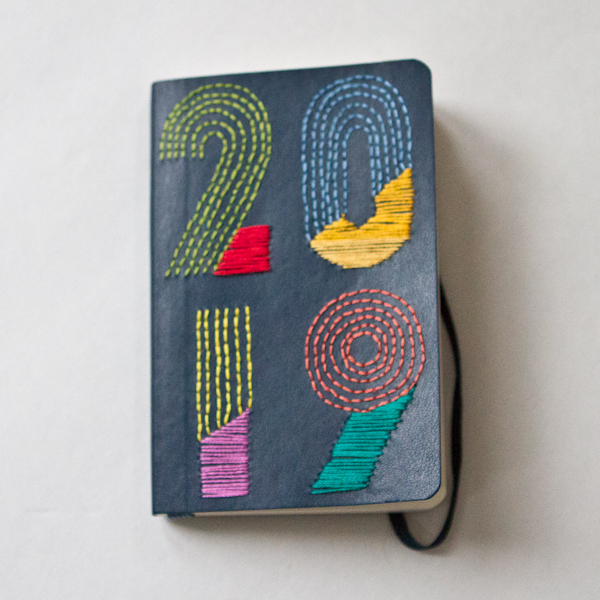
Moleskine Planner 2019
This is my this year's Moleskine Planner!
Went for retro font look with colorful threads. I found Navy blue at Chapter's that I never noticed so gave it a try with this.
You can also check out my previous agenda I did too! All post has tutorials.
2016 Moleskine Planner
2017 Moleskine Planner
2018 Moleskine Planner
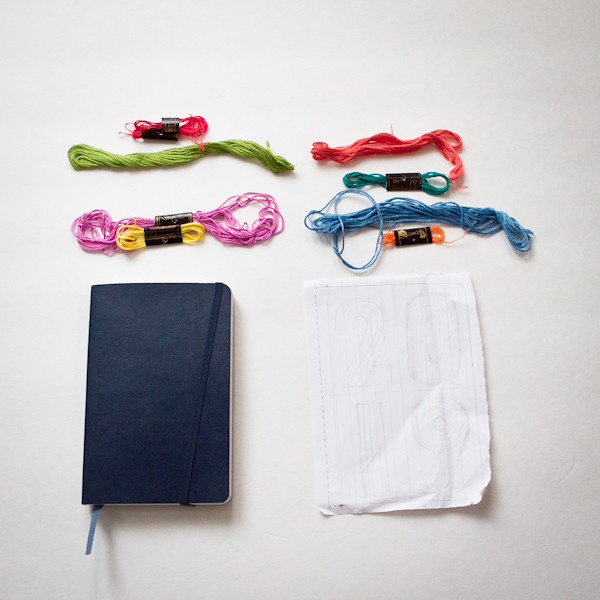
Materials:
- 2019 Navy Blue Moleskine Planner
- 1 Sewing Needle
- 8 Colors Embroidery Threads of your choice
- Sewing Awl or Ice Pick
- Pencil and Eraser
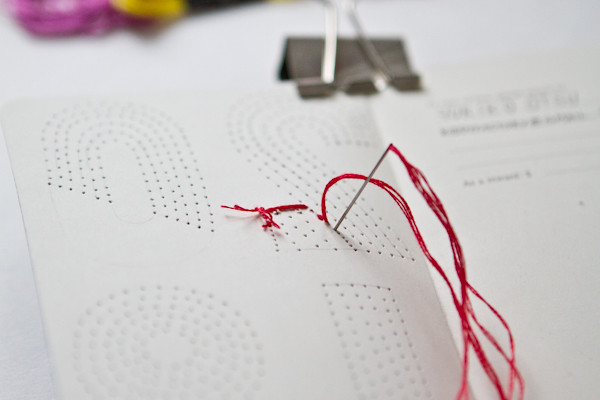
Step 1:
Transfer your design on the back of the cover of your planner(You can check here for more tutorial).
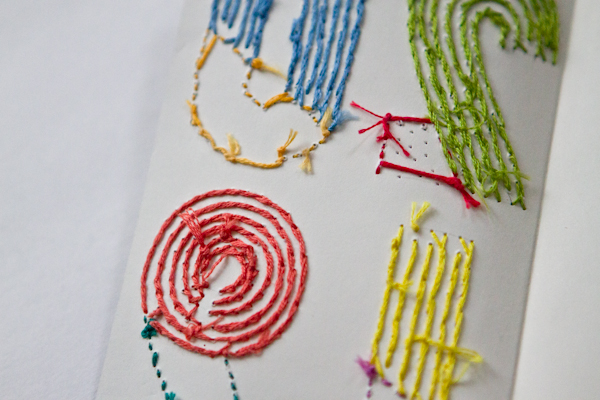
Poke holes following your design by using sewing awl.
Step 2:
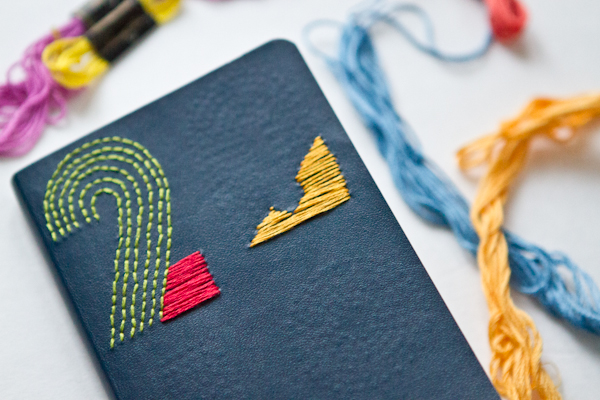
With selected color threads, stitch your design.


This is how the back side looks like.
Happy 2019!
Went for retro font look with colorful threads. I found Navy blue at Chapter's that I never noticed so gave it a try with this.
You can also check out my previous agenda I did too! All post has tutorials.
2016 Moleskine Planner
2017 Moleskine Planner
2018 Moleskine Planner
Materials:
- 2019 Navy Blue Moleskine Planner
- 1 Sewing Needle
- 8 Colors Embroidery Threads of your choice
- Sewing Awl or Ice Pick
- Pencil and Eraser
Step 1:
Transfer your design on the back of the cover of your planner(You can check here for more tutorial).
Poke holes following your design by using sewing awl.
Step 2:
With selected color threads, stitch your design.
This is how the back side looks like.
Happy 2019!

Comments
Post a Comment