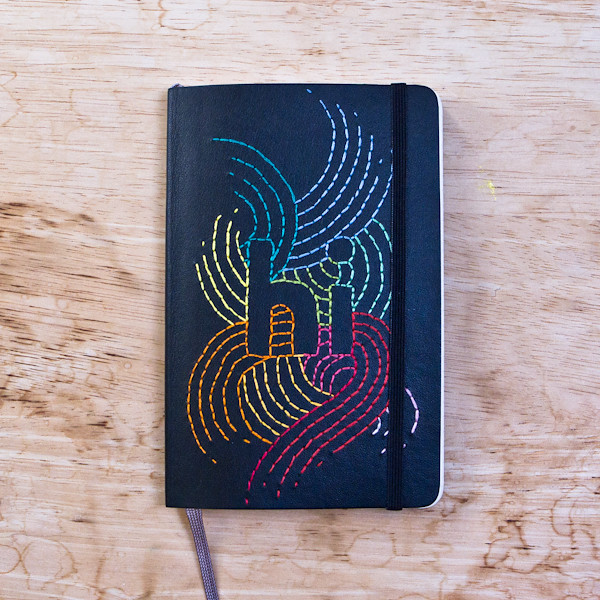
Moleskine Planner 2018
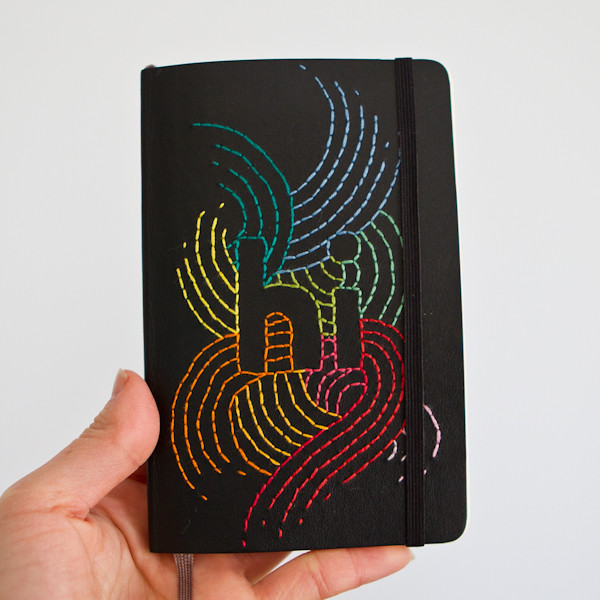
Here is my 2018's Moleskine Agenda!
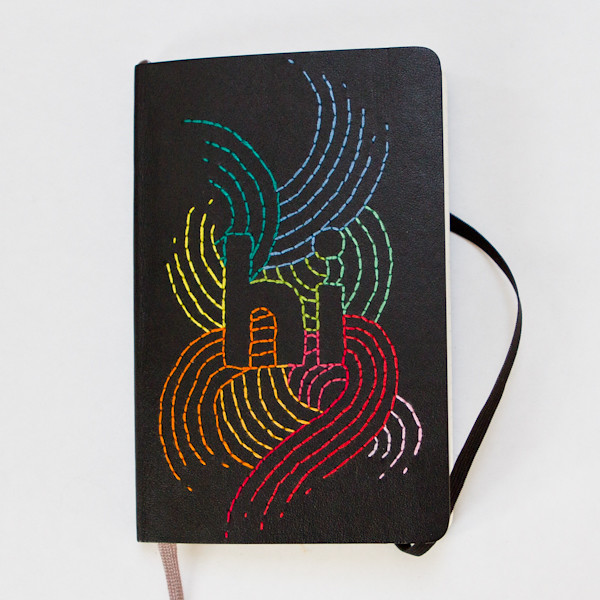
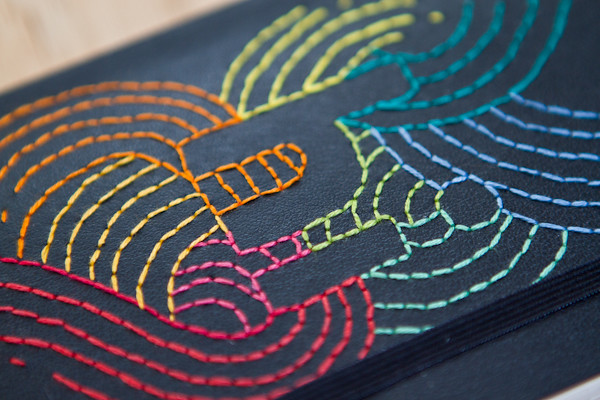
Went for simple "hi" with colorful flowly wave wrapping around the letters.
You can also check out my previous agenda I did too!
2016 Moleskine Planner
2017 Moleskine Planner
Materials:
- 2018 Moleskine
- 1 Sewing Needle
- 10 Colors Embroidery Threads
- Sewing Awl or Ice Pick
- Pencil and Eraser
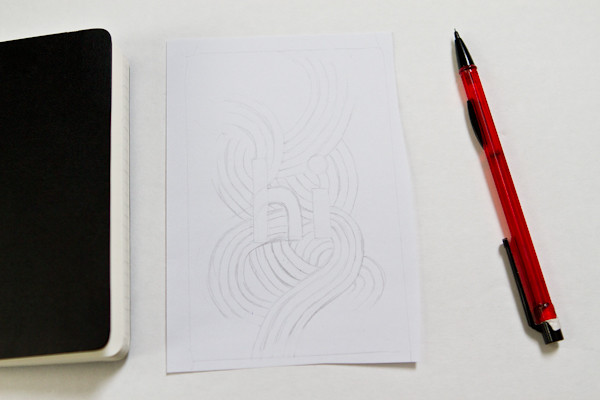
Step 1:
Draw your design on a piece of paper with same size as the agenda.
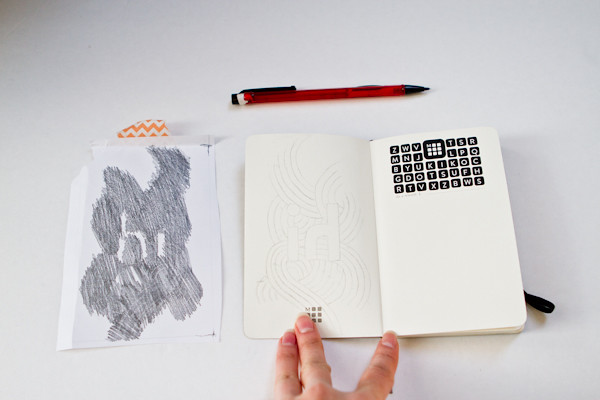
Step 2:
Step to transfer the design on the agenda, face the front against the window and trace the design on the back side of the paper.

Step 3:
On the front side, use pencil to color in the entire design, then flip the paper on to the backside of the agenda's cover and re-trace the design.
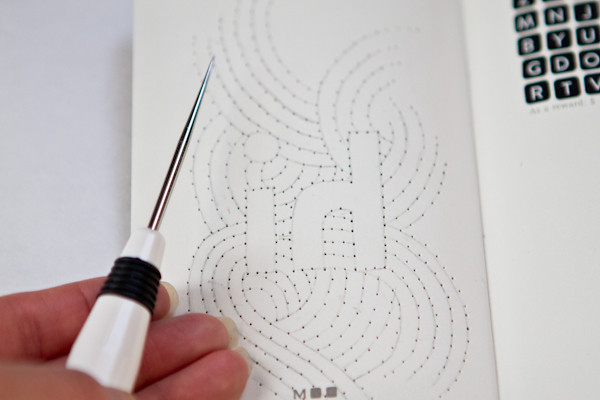
Step 4:
With pierce, pierce the holes following the pattern.
Step 5:
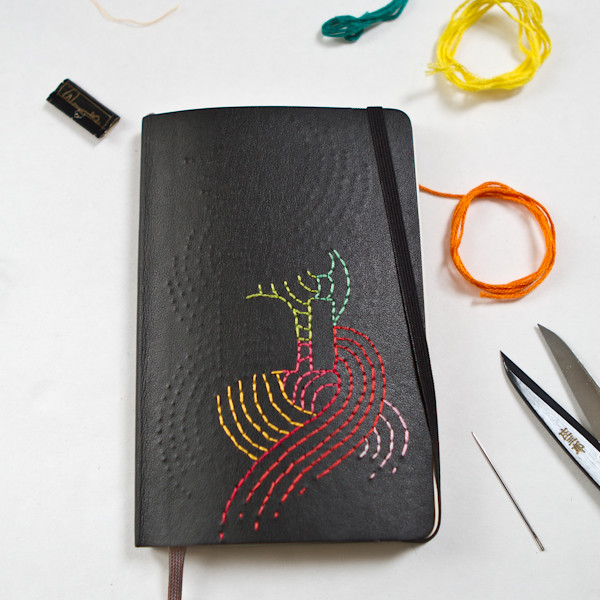
Decide colors you wish to use. For this I used 2 threads to stitch.

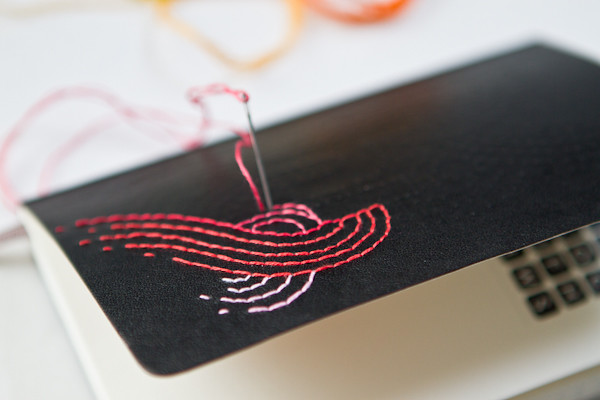
Step 6:
And then stitch stitch stitch.
Step 7:
And here is the back side of it.
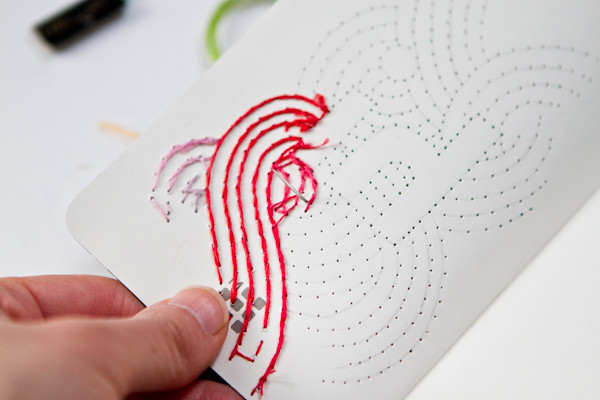
And keep stitching....
And ta-da!


Went for simple "hi" with colorful flowly wave wrapping around the letters.
You can also check out my previous agenda I did too!
2016 Moleskine Planner
2017 Moleskine Planner
Materials:
- 2018 Moleskine
- 1 Sewing Needle
- 10 Colors Embroidery Threads
- Sewing Awl or Ice Pick
- Pencil and Eraser
Step 1:
Draw your design on a piece of paper with same size as the agenda.
Step 2:
Step to transfer the design on the agenda, face the front against the window and trace the design on the back side of the paper.
Step 3:
On the front side, use pencil to color in the entire design, then flip the paper on to the backside of the agenda's cover and re-trace the design.
Step 4:
With pierce, pierce the holes following the pattern.
Step 5:
Decide colors you wish to use. For this I used 2 threads to stitch.
Step 6:
And then stitch stitch stitch.
Step 7:
And here is the back side of it.
And keep stitching....
And ta-da!

Comments
Post a Comment