Moleskine 2020
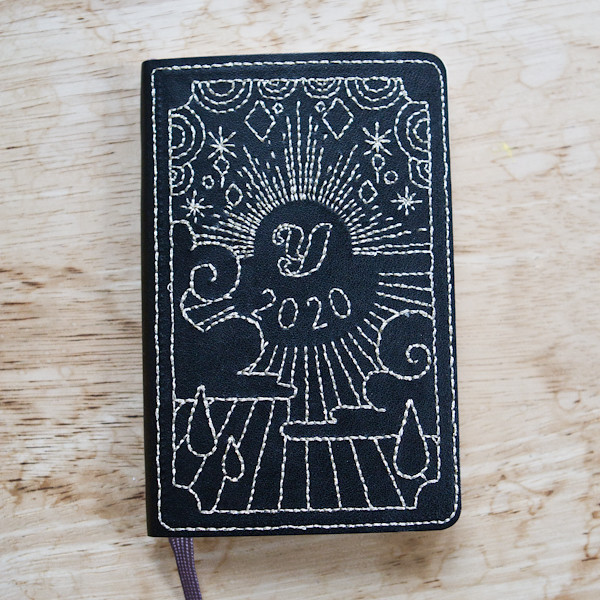
Here is my 2020's Moleskine planner decoration!
To celebrate my 20th anniversary, I made this year's cover design extra special. Tried using gold metallic thread to stitch the design.

Metallic thread was much more difficult to stitch with.
Thread has main fiber in the middle but wrapped with plastic thread(metallic thread) so it causes to get stuck through the hole more often because it's not as flexible as normal embroidery threads.
MATERIAL:
- Moleskine Planner
- Transferable paper with design on it
- Stitching needle
- Sewing Awl or Ice Pick
- Metallic embroidery thread
- Pencil
Step1:
Print out your design with mirror-flipped image.

Step 2:
On the back side of the mirror-flipped print out, use pencil to cover the whole page to make it transferable paper(img left).
Trace all the line drawing directly to the back side of the planner's front cover(img right).

Step 3:
With sewing awl, poke holes at stitching length following the transferred line drawing.


Step 4:
Stitch your design.
I would also recommend to make those stitching holes larger just so the metallic thread will go through easier.

And this is the final:


It's been 8 years now since I started using Moleskine planner.
This size has been great for me, what I love the most about using this planner is, I can doodle with their quality paper and plan my week at the same time.

Please do take a look at my previous designs I did for these! (at least the ones I started with tutorials)
2016 Moleskine Planner
2017 Moleskine Planner
2018 Moleskine Planner
2019 Moleskine Planner

To celebrate my 20th anniversary, I made this year's cover design extra special. Tried using gold metallic thread to stitch the design.
Metallic thread was much more difficult to stitch with.
Thread has main fiber in the middle but wrapped with plastic thread(metallic thread) so it causes to get stuck through the hole more often because it's not as flexible as normal embroidery threads.
MATERIAL:
- Moleskine Planner
- Transferable paper with design on it
- Stitching needle
- Sewing Awl or Ice Pick
- Metallic embroidery thread
- Pencil
Step1:
Print out your design with mirror-flipped image.
Step 2:
On the back side of the mirror-flipped print out, use pencil to cover the whole page to make it transferable paper(img left).
Trace all the line drawing directly to the back side of the planner's front cover(img right).
Step 3:
With sewing awl, poke holes at stitching length following the transferred line drawing.
Step 4:
Stitch your design.
I would also recommend to make those stitching holes larger just so the metallic thread will go through easier.
And this is the final:
It's been 8 years now since I started using Moleskine planner.
This size has been great for me, what I love the most about using this planner is, I can doodle with their quality paper and plan my week at the same time.
Please do take a look at my previous designs I did for these! (at least the ones I started with tutorials)
2016 Moleskine Planner
2017 Moleskine Planner
2018 Moleskine Planner
2019 Moleskine Planner

Comments
Post a Comment